DNS Intelligent Resolution

 Custom Authoritative DNS
 Cloud Computing Services

 Server Rental
 DDoS protection
 About DNS.COM
 Support
 Contact Us
 AFF
AFF
 API Docs

 CN
CN
 EN
EN

How to Set Up a GoDaddy Domain as Your Own DNS Server – 2026 Latest Complete Guide
This article mainly illustrates how to turn a GoDaddy domain into a private DNS server for independent record management.
Many webmasters who register domains on GoDaddy want to set up their own authoritative DNS name servers, such as `shturl.cc/4jvWJkR0` and `shturl.cc/3t28V88W`, to provide resolution services for other domains. The obvious advantages include full control over DNS records, freedom from restrictions imposed by third-party DNS providers, and improved stability and security of domain name resolution.
However, GoDaddy’s backend is not beginner-friendly. The English interface coupled with frequently updated navigation paths often leaves new users stuck during configuration. This guide breaks down the entire procedure in plain terms to help you complete the setup in one go.
I. Preparations: Complete These Three Tasks First
Before you start configuration, confirm the following prerequisites:
1. Register a domain on GoDaddy. Make sure the domain is active, non-expired and not locked.
2. Deploy a DNS server. Prepare one or more servers with DNS software such as BIND or PowerDNS installed, and obtain their public IP addresses.
For example, assume your DNS server IP is `103.230.237.247`. Multiple IPs can be assigned to separate name server hostnames.
3. Verify network connectivity. Confirm that the IP is a public IP and that port 53 (both UDP and TCP) is open externally. Private LAN IPs cannot be used for public DNS resolution.
Note: If you do not maintain your own DNS infrastructure, you may contact DNS.COM. Its professional team can build a customized private DNS solution for you.
II. Step-by-Step GoDaddy Backend Setup (Latest 2026 Version)
Option 1: English Interface (Recommended)
GoDaddy’s English version receives timely updates and retains all complete features. The Chinese translation often contains inaccurate terminology that leads to misoperation. We strongly recommend using the English panel.
Step 1: Access Domain Management
Log into your GoDaddy account and click My Products at the top to open the product list. Locate the target domain.
Step 2: Open Domain DNS Settings
Click the DNS button next to the domain, or enter the domain details page and switch to the DNS tab to open the DNS management panel.
Step 3: Locate Hostname Settings
Scroll to the bottom of the DNS page and find the Hostnames section. Click Manage or Add.
Step 4: Add Hostnames and Corresponding IPs
In the pop-up window, fill in the hostname and public IP for your name server:
| Field | Example | Description |
| Hostname | `ns1` | Prefix to form `shturl.cc/4jvWJkR0` |
| IP Address | `103.230.237.247` | Public IP of this DNS node |
For redundancy (at least two name servers are recommended), click Add More to add `ns2` with the second IP address.
Step 5: Save Changes
Click Save. GoDaddy will register these hostnames as authoritative DNS servers. Global propagation normally takes 10 minutes to one hour.
Option 2: Chinese Interface
If you prefer the Chinese version, follow this path:
1. Log in and enter Domain Manager.
2. Select your domain to open Domain Settings.
3. Scroll down and enter Manage DNS.
4. Keep scrolling to the bottom and open the Hostnames page.
5. Click Add, fill in hostnames and IPs, then save the configuration.
III. Critical Post-Setup Step
Most users stop here after adding hostnames, which is a common mistake.
After creating the hostnames, you must add corresponding DNS records. Go to DNS Records > Add, then create A records for `shturl.cc/4jvWJkR0` and `shturl.cc/3t28V88W` pointing to your DNS server IPs.
Reason:
- Your name servers themselves must be resolvable; otherwise other domains cannot reach them.
- Registering hostnames only informs GoDaddy that the domain will be used as a DNS node. A records are required to complete the resolution chain.
- Missing this step will result in unreachable DNS services.
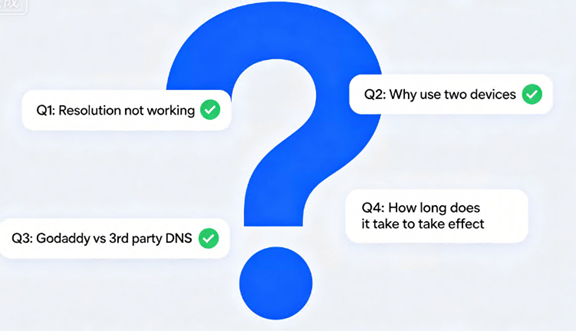
IV. Common Issues & Troubleshooting
Q1: Why are the hostnames not taking effect?
A: Check these items:
① Corresponding A records exist;
② Port 53 is fully open on the DNS server;
③ The address is a public IP instead of an internal IP;
④ The TTL value is properly set between 300 and 600 seconds.
Q2: Why are two name servers (ns1 & ns2) required?
A: DNS requires high availability. A single node failure will break all domain resolution. Deploy at least two DNS servers in different data centers for redundancy.
Q3: What is the difference between native GoDaddy DNS and third-party DNS services?
A: GoDaddy’s built-in DNS only provides basic functions. Professional providers such as DNS.COM offer advanced features including geo-routing, load balancing, DDoS protection and domain anti-pollution services. For enterprise-grade requirements, point your domain’s NS records to a professional DNS platform.
Q4: How long will changes take to propagate globally?
A: Hostname registration on GoDaddy usually takes 10–60 minutes. If you modify domain NS records pointing to external DNS, global synchronization may take 24–48 hours.
V. Advanced Alternative: Why Choose Professional DNS Services
Setting up private DNS name servers on a GoDaddy domain suits technically experienced users who want full control over resolution.
You should switch to a dedicated DNS provider if you need:
- Faster response speed and higher service availability
- Geo-based intelligent routing by region and ISP
- Protection against DNS pollution and DDoS attacks
- Zero server maintenance workload
As a global all-in-one infrastructure security provider, DNS.COM operates 13 data centers worldwide and manages more than 20 million domains. Its intelligent DNS supports both IPv4 and IPv6, with real-time monitoring and quick recovery against domain pollution. Both individual webmasters and enterprises can find suitable resolution plans on DNS.COM.
To deploy your own DNS servers with a GoDaddy domain, stick to three core steps: build the DNS service → register hostnames plus IPs on GoDaddy → create matching A records. The process looks simple, yet many people run into problems when configuring A records for name server hostnames.
If you encounter any difficulties during operation, contact the 7×24 technical support team of DNS.COM. Log into your GoDaddy console and start your configuration right away.


 Online Customer service